6 Ways to Maximize Your Vegetable Garden
Get the most out of your garden with these 6 ways to maximize your vegetable garden. Solutions include raised beds, improving soil, and many others.
No place to dig a garden? Or do you have bad soil, a bad back or just aren’t crazy about digging up grass to plant vegetables? Believe it or not, vegetables can grow in ordinary straw bales – even if they’re set on top of a driveway or patio. Using a straw bale as a container is relatively easy and the raised height helps eliminate back breaking bending and the heavy work of digging and turning the soil to plant. It's an especially attractive option if you live in an urban setting with little access to soil or are simply plagued with bad soil.
The technique has been popularized lately by Minnesota horticulturist Joel Karsten and his 2013 book “Straw Bale Gardening.” Karsten says the key is “conditioning” the bales ahead of time so they become self-feeding growing boxes similar to containers – except you end up with a half-decayed pile of composted straw by the end of the season.

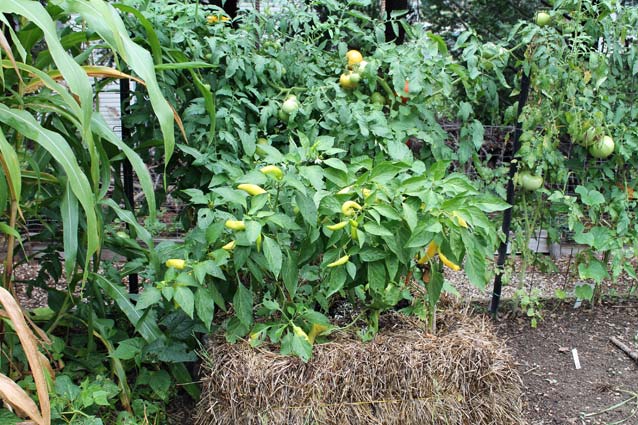
Tomatoes and hot peppers are growing well in these straw bales. G. Weigel
Start with a straw bale, not hay, which has seeds. Bales are available at most home centers and farm stores.
About 12 days before planting, begin a process of conditioning the bales. You'll prep them for planting with a regimen of scattering plant food on the bale and soaking it with water. "The goal is to partially compost the bales, just enough to get them cooking before plants or seeds are introduced," Karsten says.
Day 1: On the first day, set the bales so the cut ends are facing up and down and secure them with posts or stakes. Generously scatter a high nitrogen fertilizer over the top of each bale, such as 1/2 cup of lawn fertilizer or 3 cups of organic plant food. Then soak the bales until water comes out of the bottom.
Days 2, 4 and 6: Water again on even days.
Days 3, 5, and 7: Top dress the bale on odd days with additional fertilizer.
Days 7, 8 and 9: Scatter again with fertilizer, except reduce amounts to one-quarter of a cup of lawn fertilizer or 1½ cups of organic fertilizer. Soak with water.
Day 10: Fertilize with 1 cup of 10-10-10 granular fertilizer or 3 cups of a balanced organic fertilizer (contains nitrogen, phosphorus, and potassium). Soak with water.
Time to plant. On day 12 or soon after, young plants can be inserted into slits cut in the bale and secured with potting mix.
For seeds, spread a 1- to 2-inch layer of potting mix over the top of the conditioned bale and
plant.
Water regularly during the season to keep the bales consistently damp.
Continue feeding, adding plant food every few weeks during the growing season to ensure plants are getting
plenty of nutrition, based on the label rate.
The only thing left to do is harvest away without bending over or getting muddy and don't forget to compost your straw bale once you've
picked in all your crops.
Let the bale sit a day and then plant on day 12 (or ideally by day 18).